Windows 11 - Snipping Tool
Some simple and handy tips for the Windows 11 version of the Snipping Tool.The publications and views expressed in this (blog) website are my own personal opinions and are by no means associated with my employer.
Opening the Snipping Tool App
Click into the search bar on the Task bar and search for "Snipping"
 Click either the App name "Snipping Tool" or "Open"
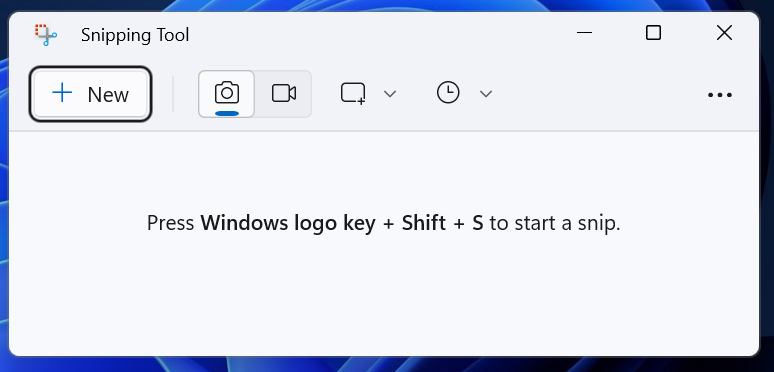 Alternatively, you can also use the key combination Windows Key + Shift + S to start a snip straight away without opening the snipping tool app directly.
Credit: Jeroen Ebus for mentioning this as a comment on my Linkedin Post
Enable use of Multiple Windows
If you need to take multiple snips, then enabling the use of multiple Windows is the option you need. To enable this do the following:
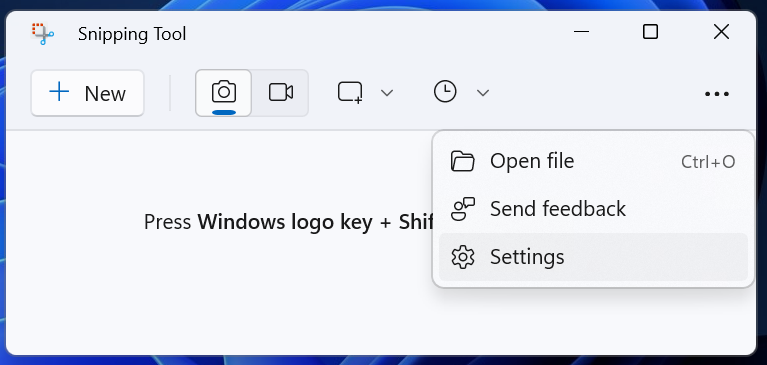
Click the 3 dots then select "Settings"
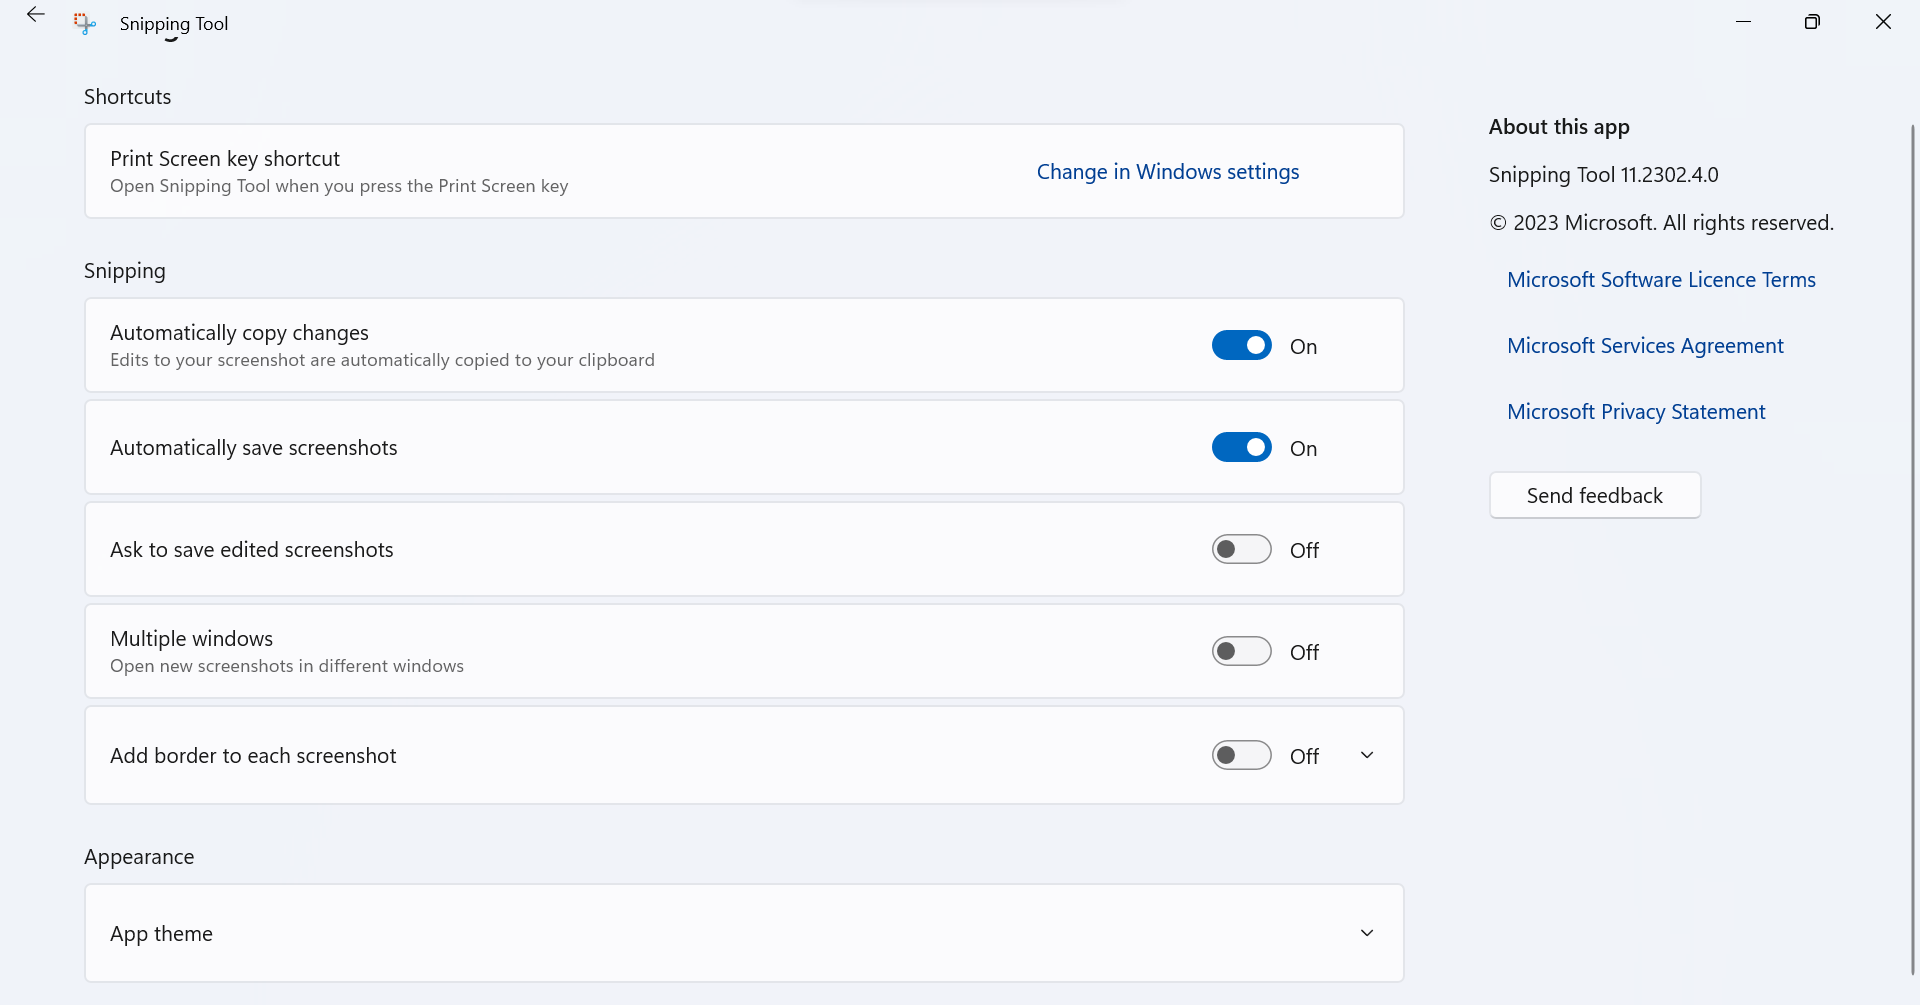
 Then under the "Snipping" Heading, toggle the appropriate options you want to turn off or on. In this case it is the "Multiple Windows" option, which will "open new screenshots in different windows"
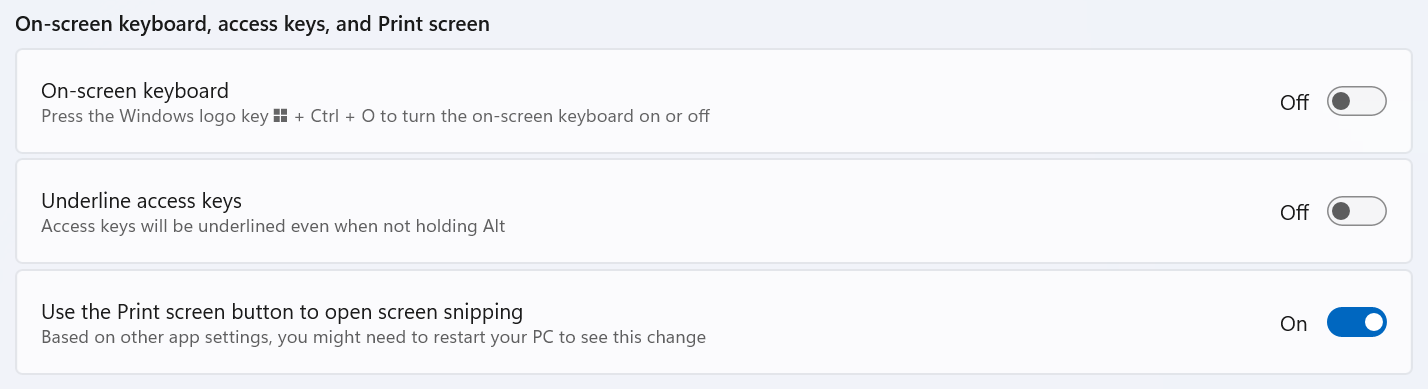
Open Snipping Tool when pressing the "PRTSC" button
In the same settings area to enable Multiple Windows, you can also be directed to the general settings area to enable the Snipping tool to be used whenever you press the "prtsc" button on your keyboard.
Click the "Change in Windows Settings" then scroll down and locate the below screenshotted section. Toggle the "Use the Print Screen Button to open screen snipping" This will likely require a device restart for this change to be applied as mentioned below the setting name.